

MY LITTLE QUEENSLANDERs:
3D-PRINTED QUEENSLANDER HOUSE MODELs
INFORMATION, TIPS & INSTRUCTIONS
🏠 So you now own your very own My Little Queenslander – no mortgage, renovation or maintenance required! 🤣
Below is some information on your model, tips for customising it and instructions on how to insert the windows!
🌟 Info
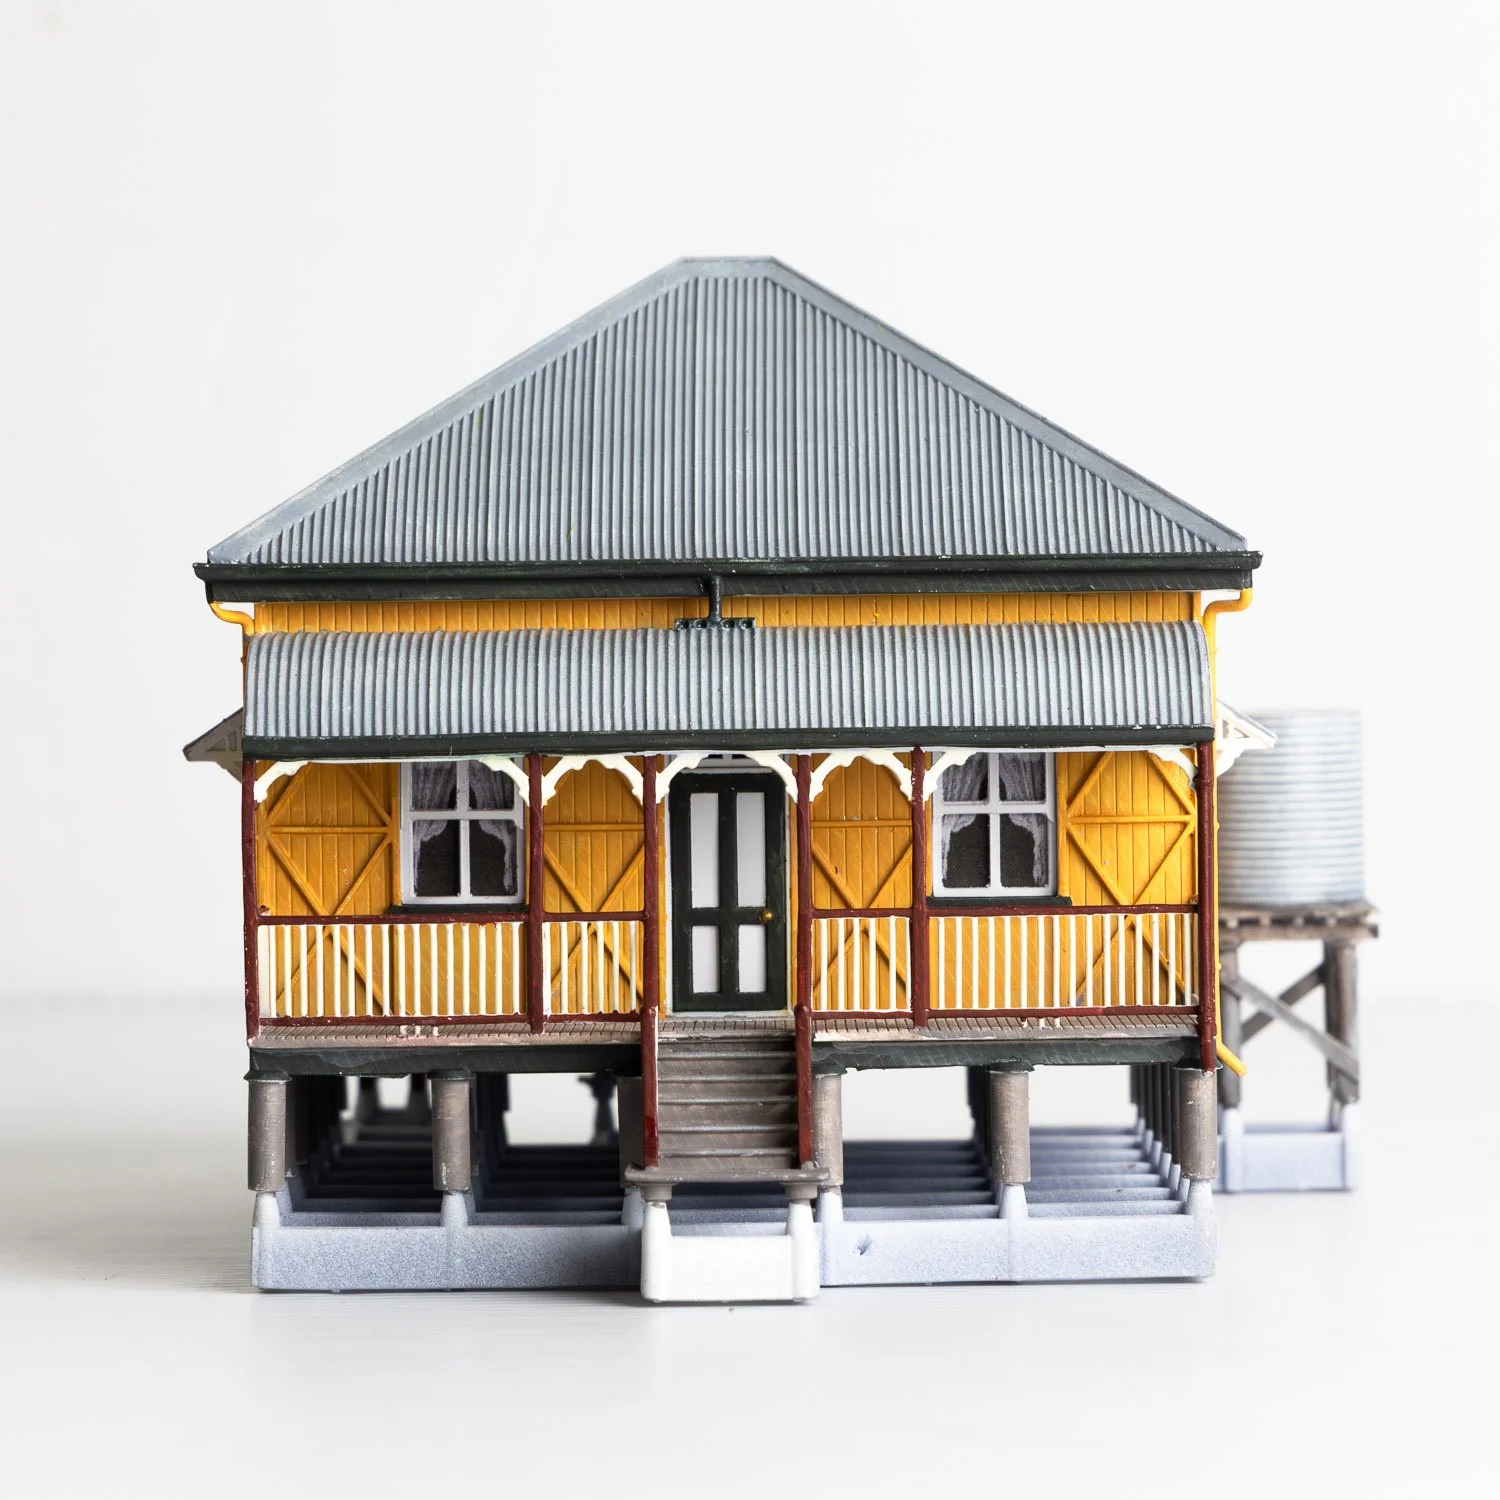
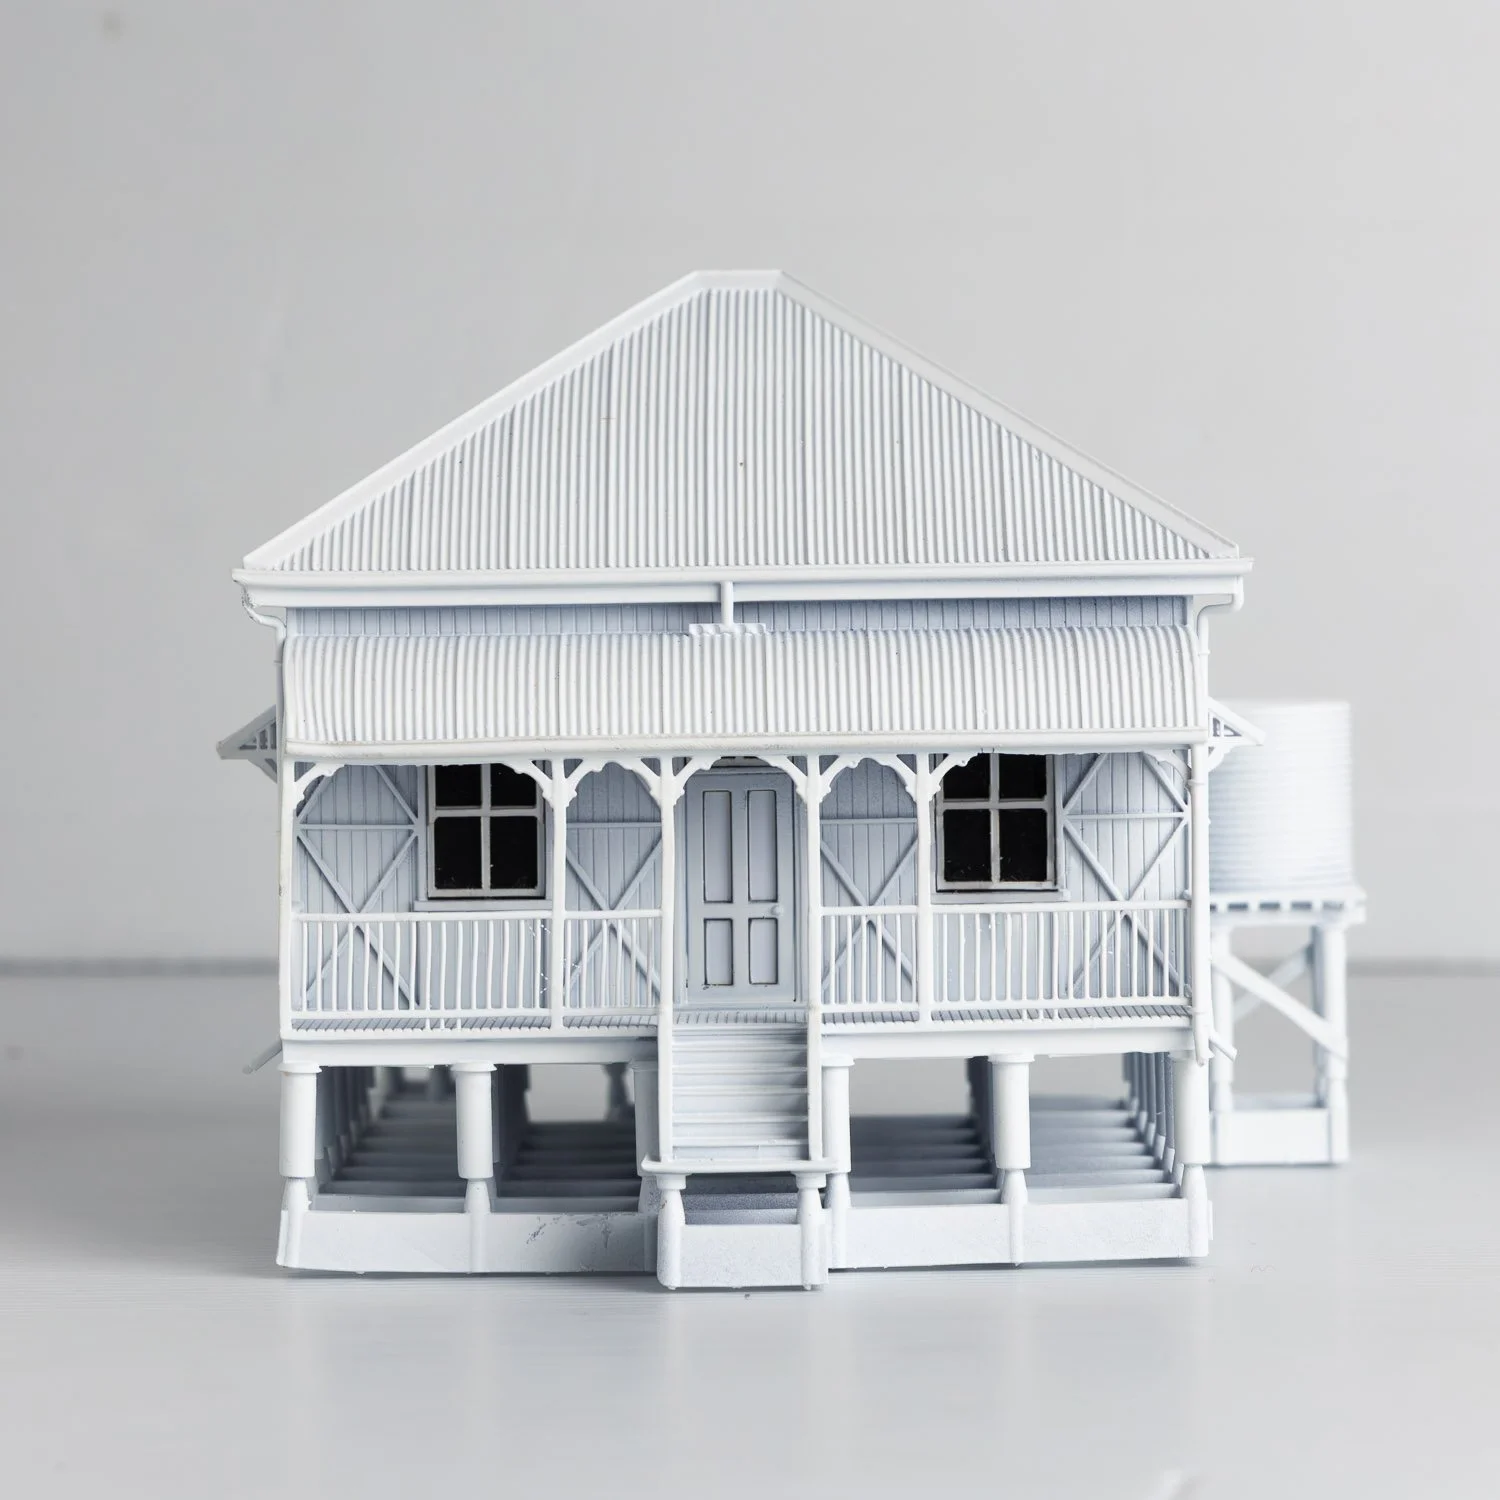
Each of our models are based on real traditional Queensland house designs. Please visit my shop to view the full range of models available!
They are precision 3D-printed for crisp architectural detail
They are designed and made by Richard and Patsy Brown of Beautiful Little Buildings, right here in sunny Queensland! More on them below!
If you’re into nerdy details, your model was 3D printed using an Anycubic resin M3 Max or M7 Max printer
The models are presented in white as ready-to-display pieces, however you will need to add the window decals yourself - see instructions below
To personalise your Little Queenslander, you could add curtains, blinds, or a tiny family photo in the window, or even include miniature family members relaxing on the front verandah! If you wish to further customise yours, you could also paint it in a colour scheme of your choice (paints not included)
🌟 Tips
Handle with care! Your model is made from resin and although it is a strong material, parts of the model are super delicate because they are so fine
We package our models with care (we even have our own bubble -wrap making machine! And yes, it’s as much fun as it sounds!) However, in the unlikely event that your model arrives damaged, please contact me as soon as possible at info@housedetective.com.au
The white models are primed and ready to paint, if you choose to do so
Please keep models out of the reach of children as if small parts do break off, they may be a choking hazard
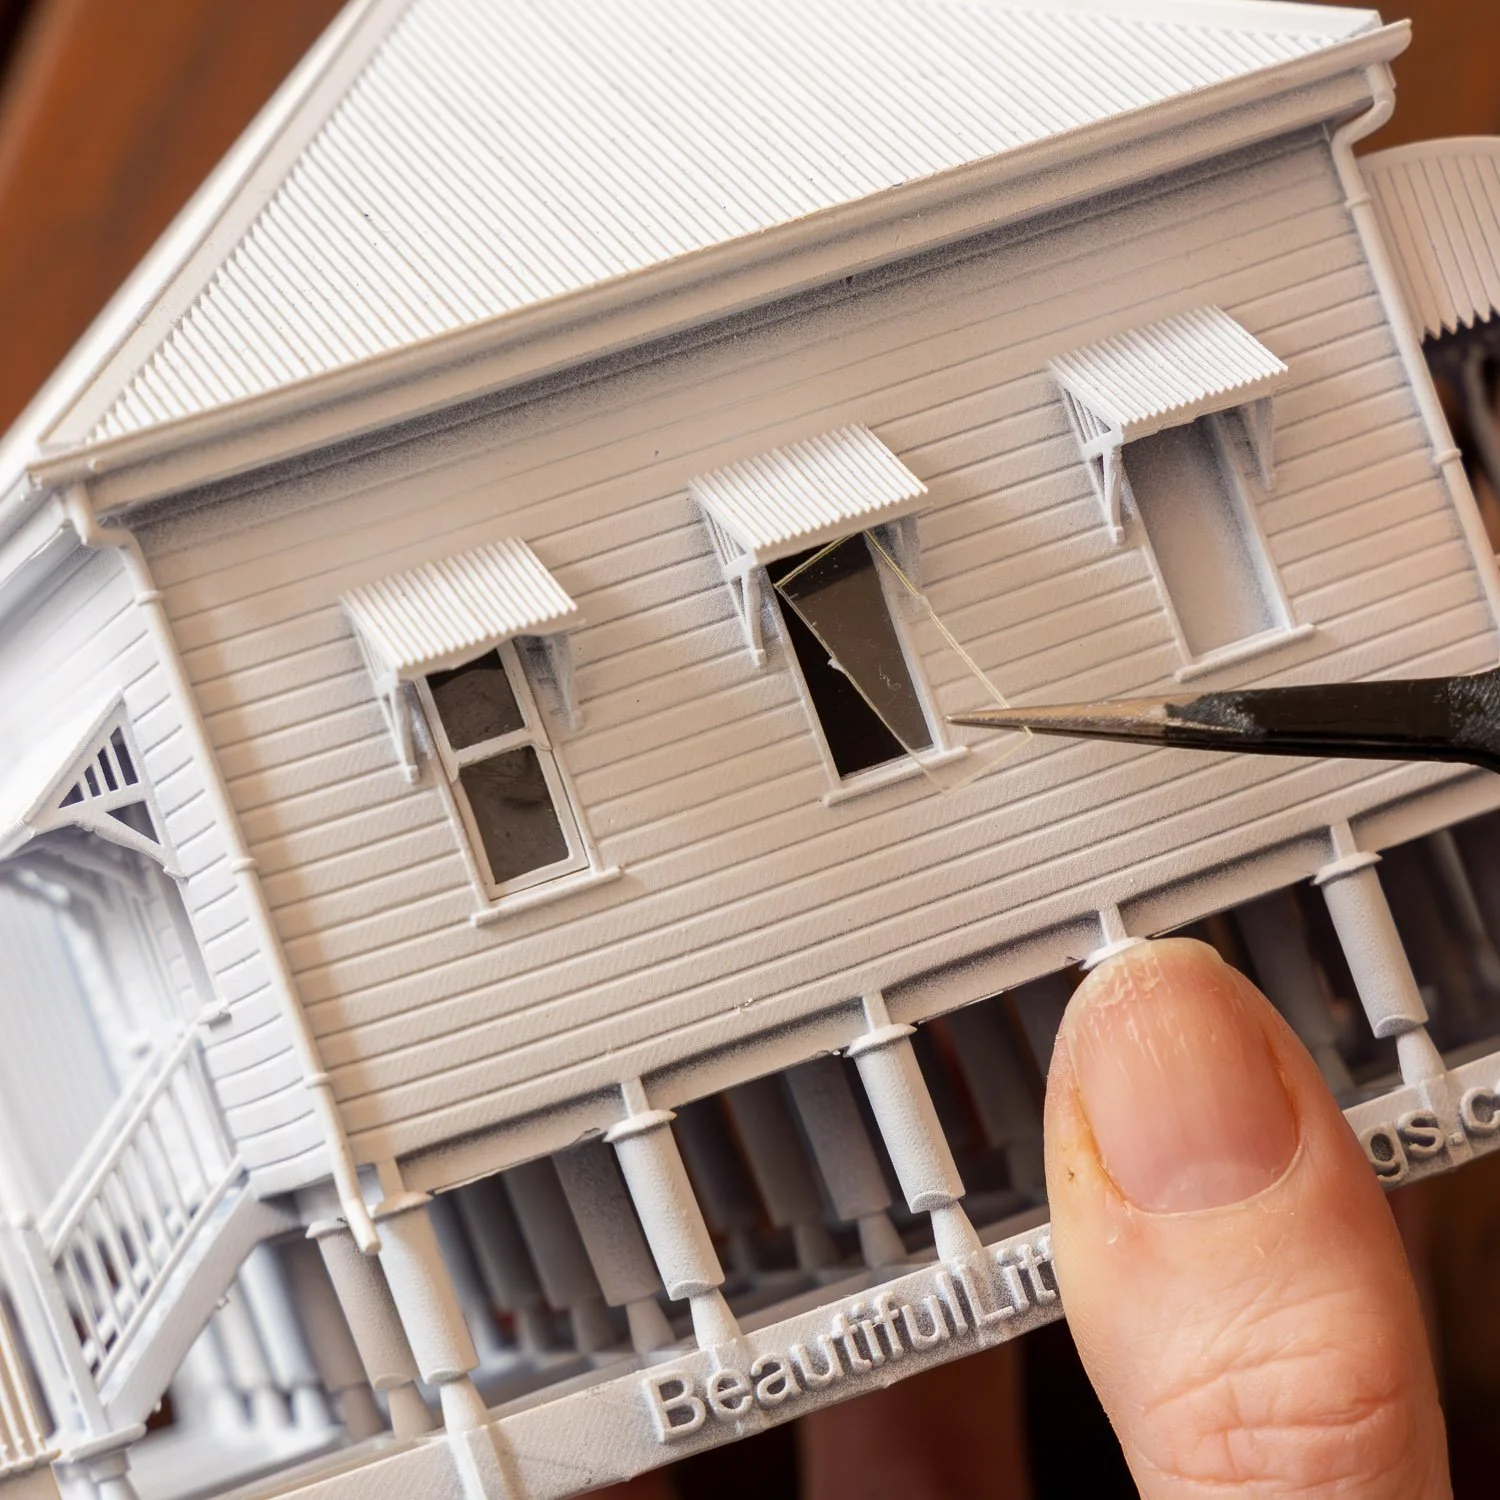
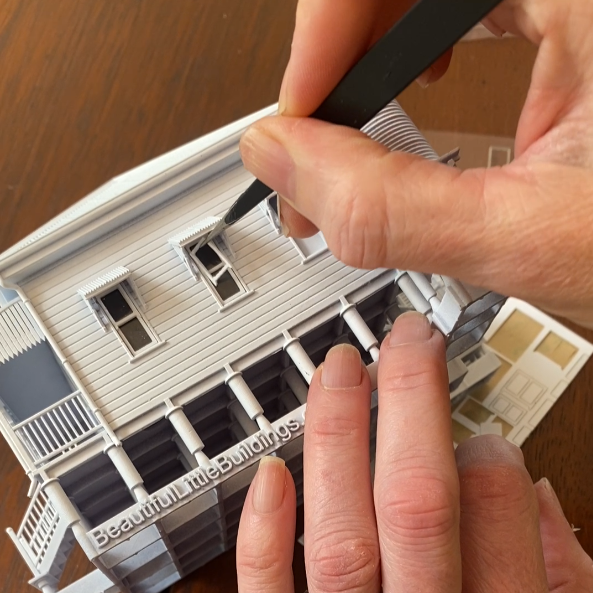
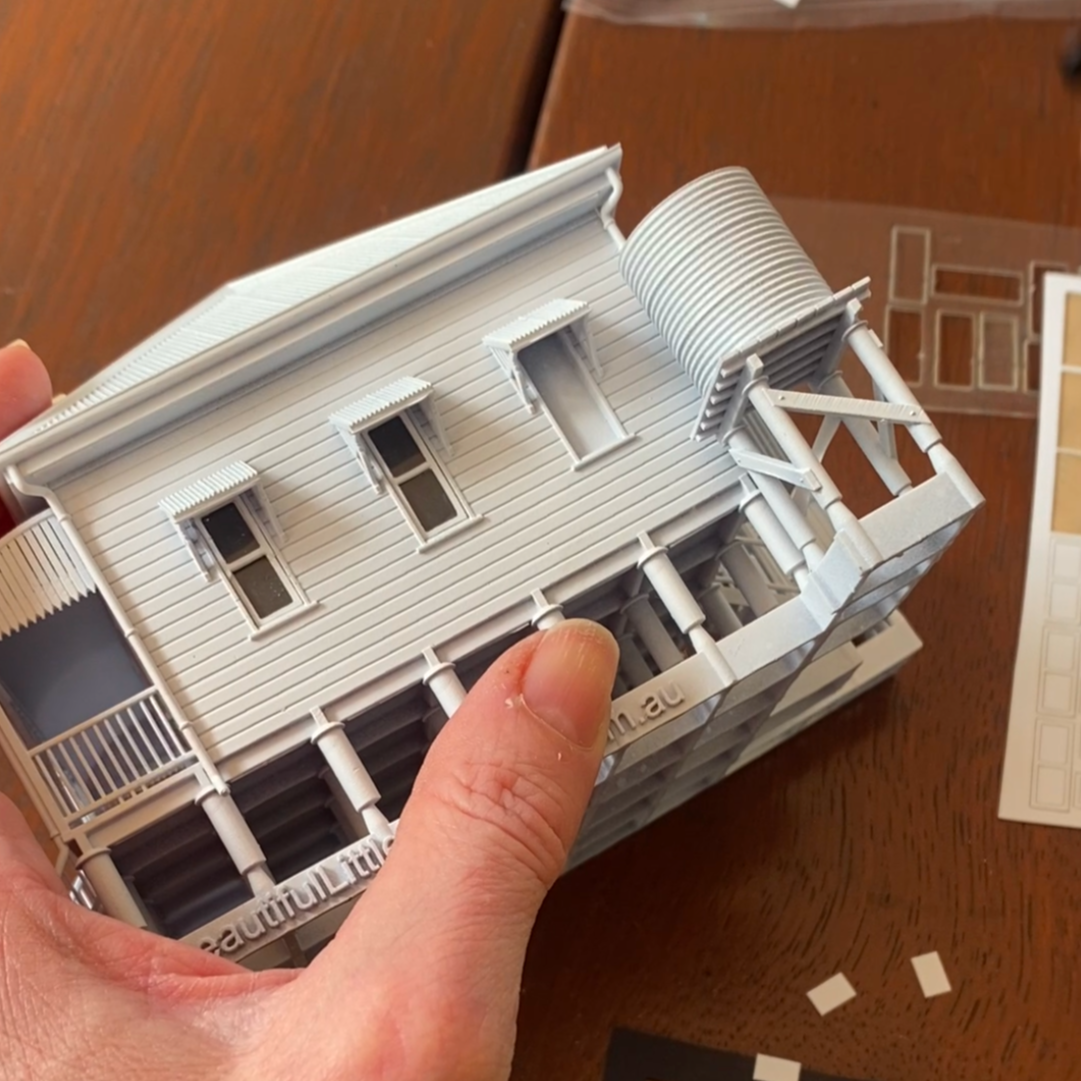
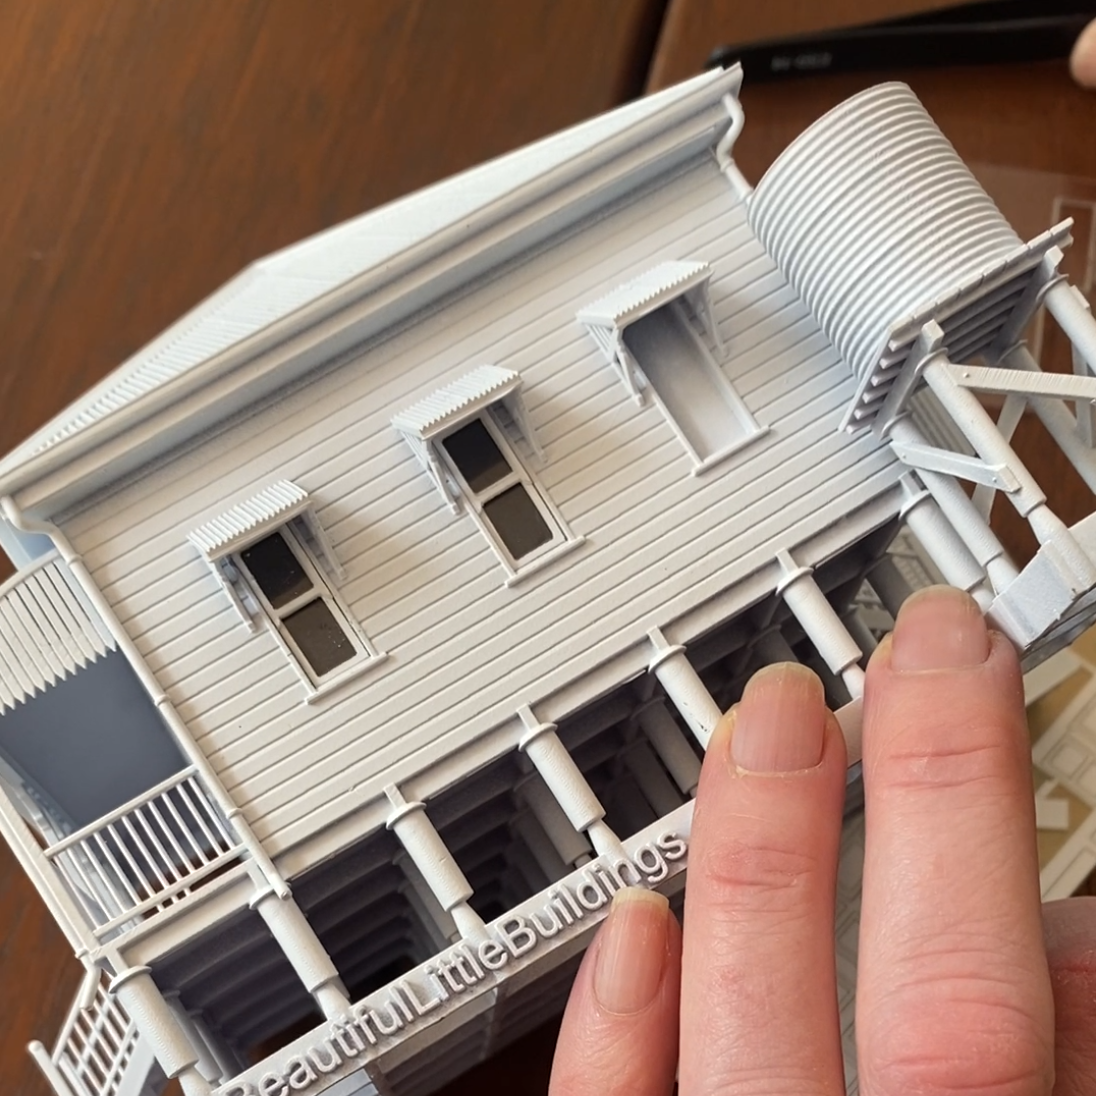
🌟 Instructions for installing windows
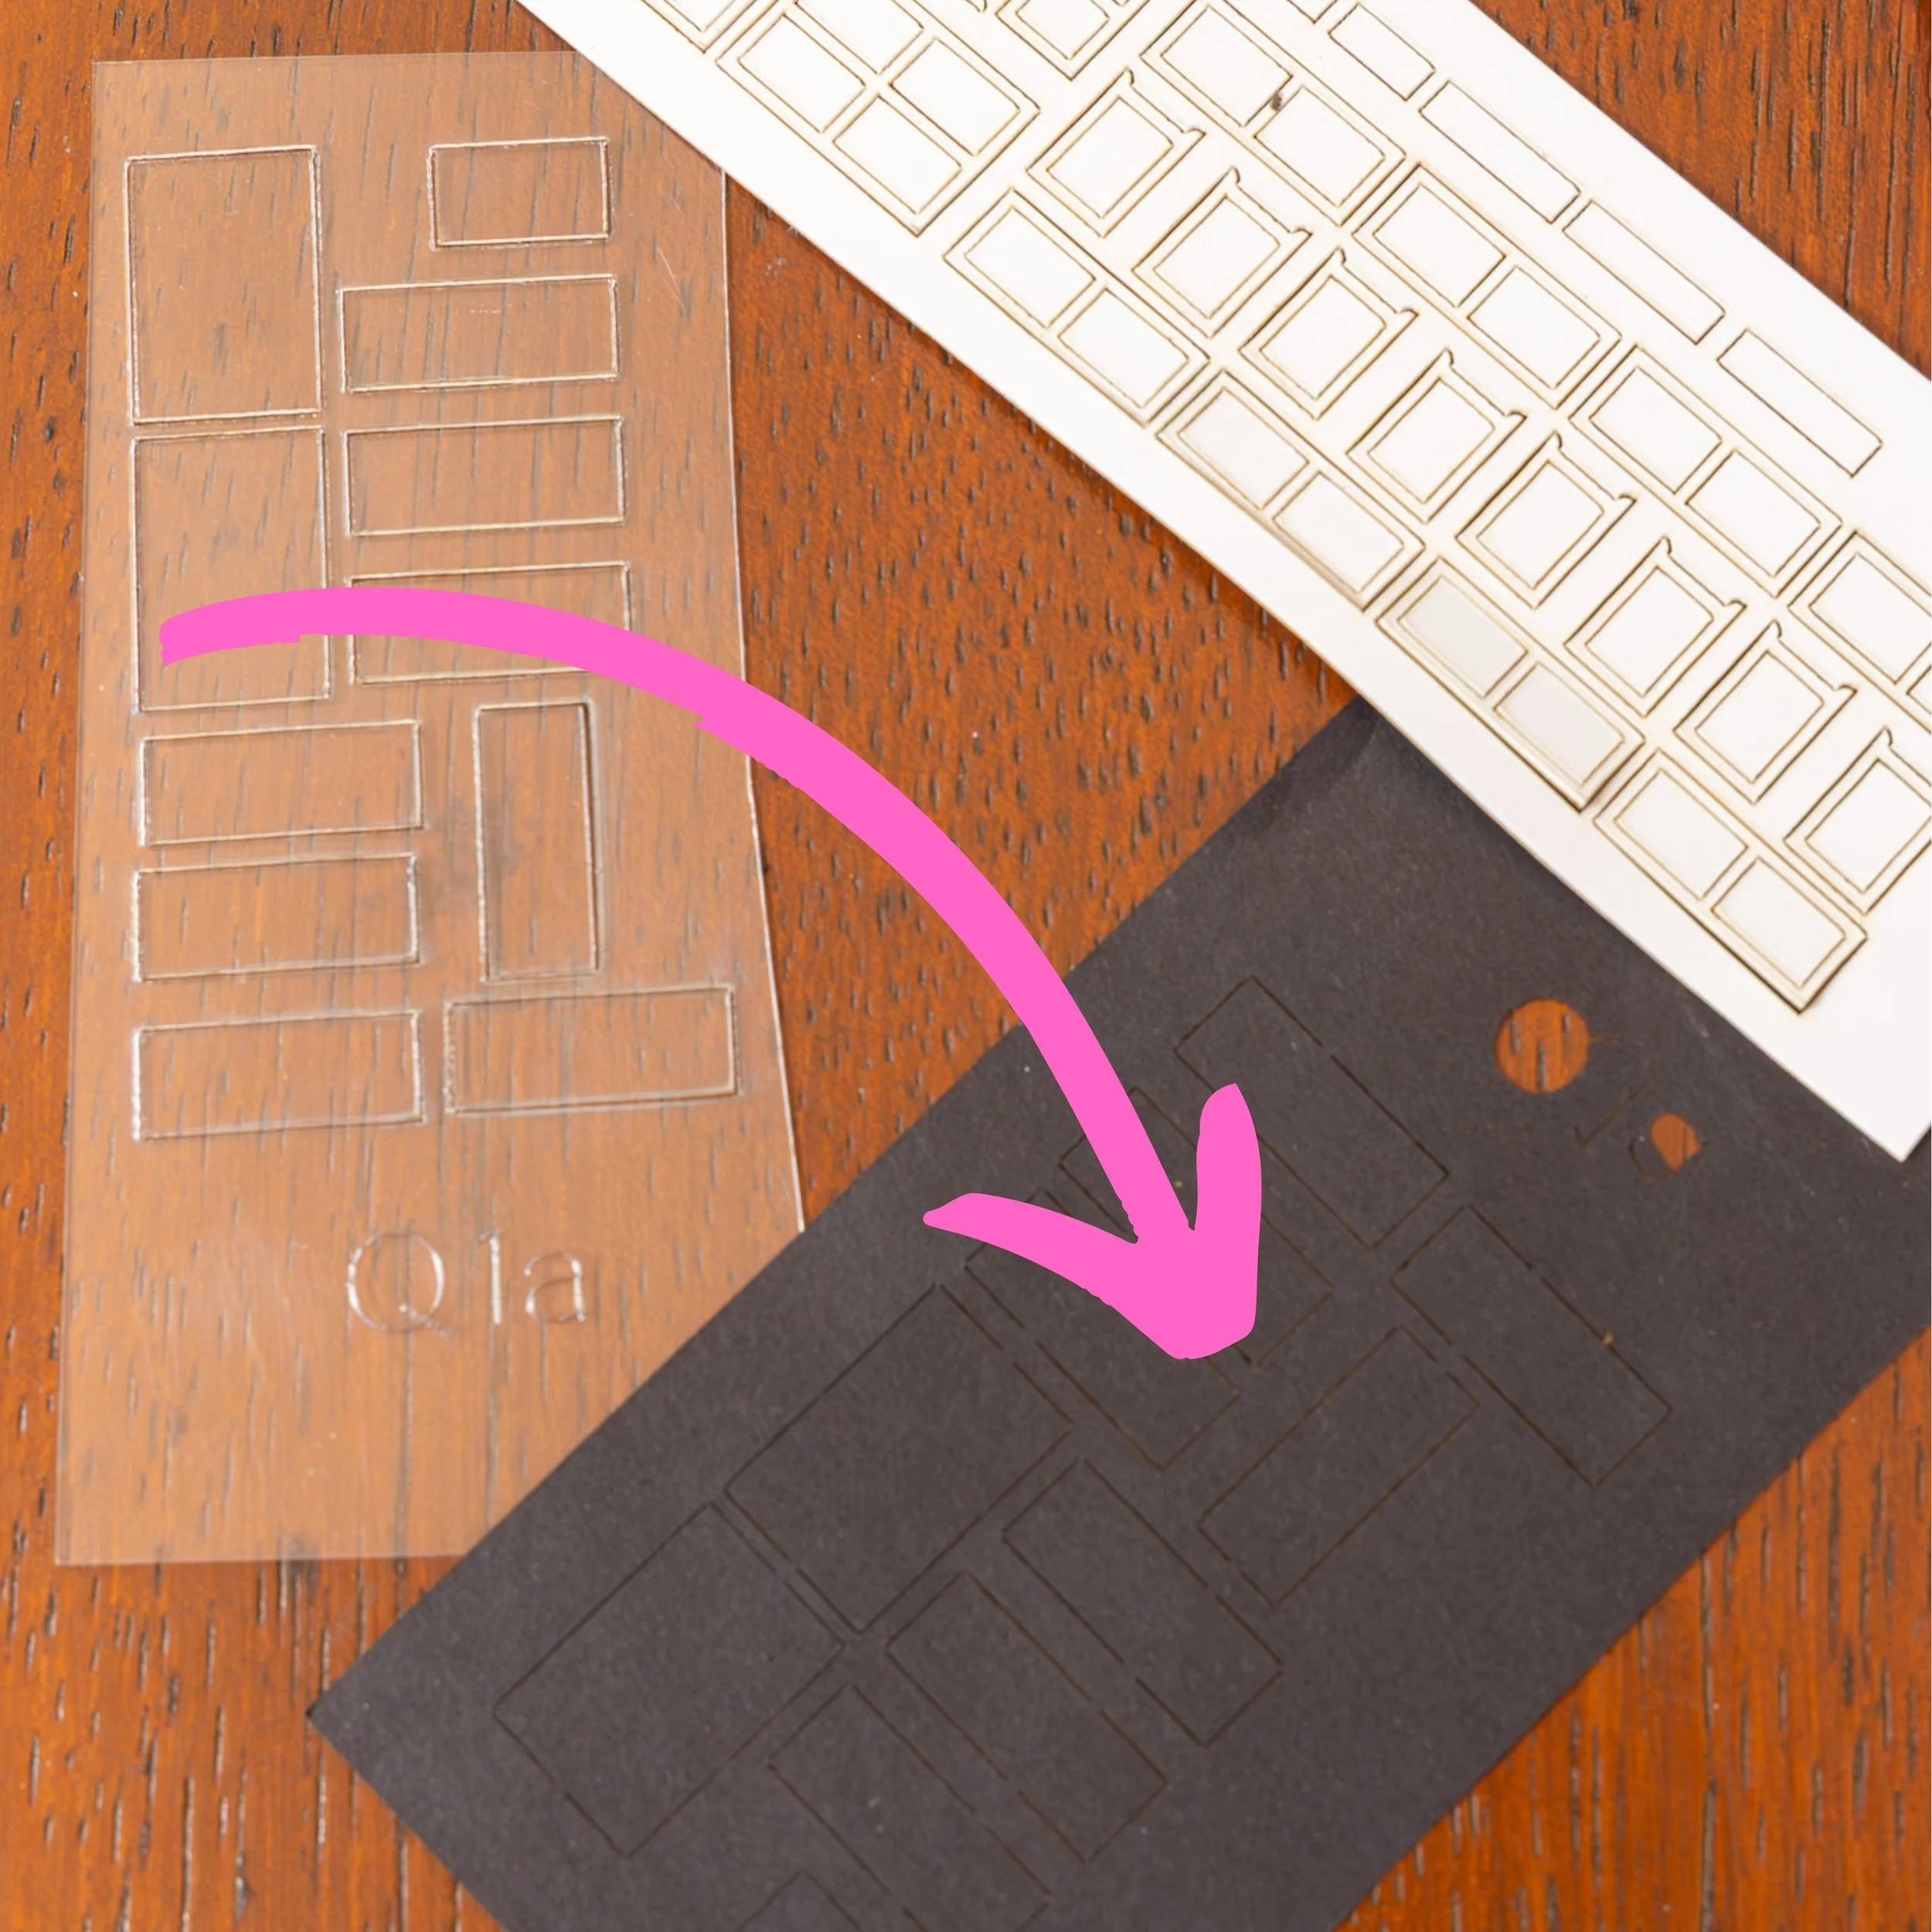
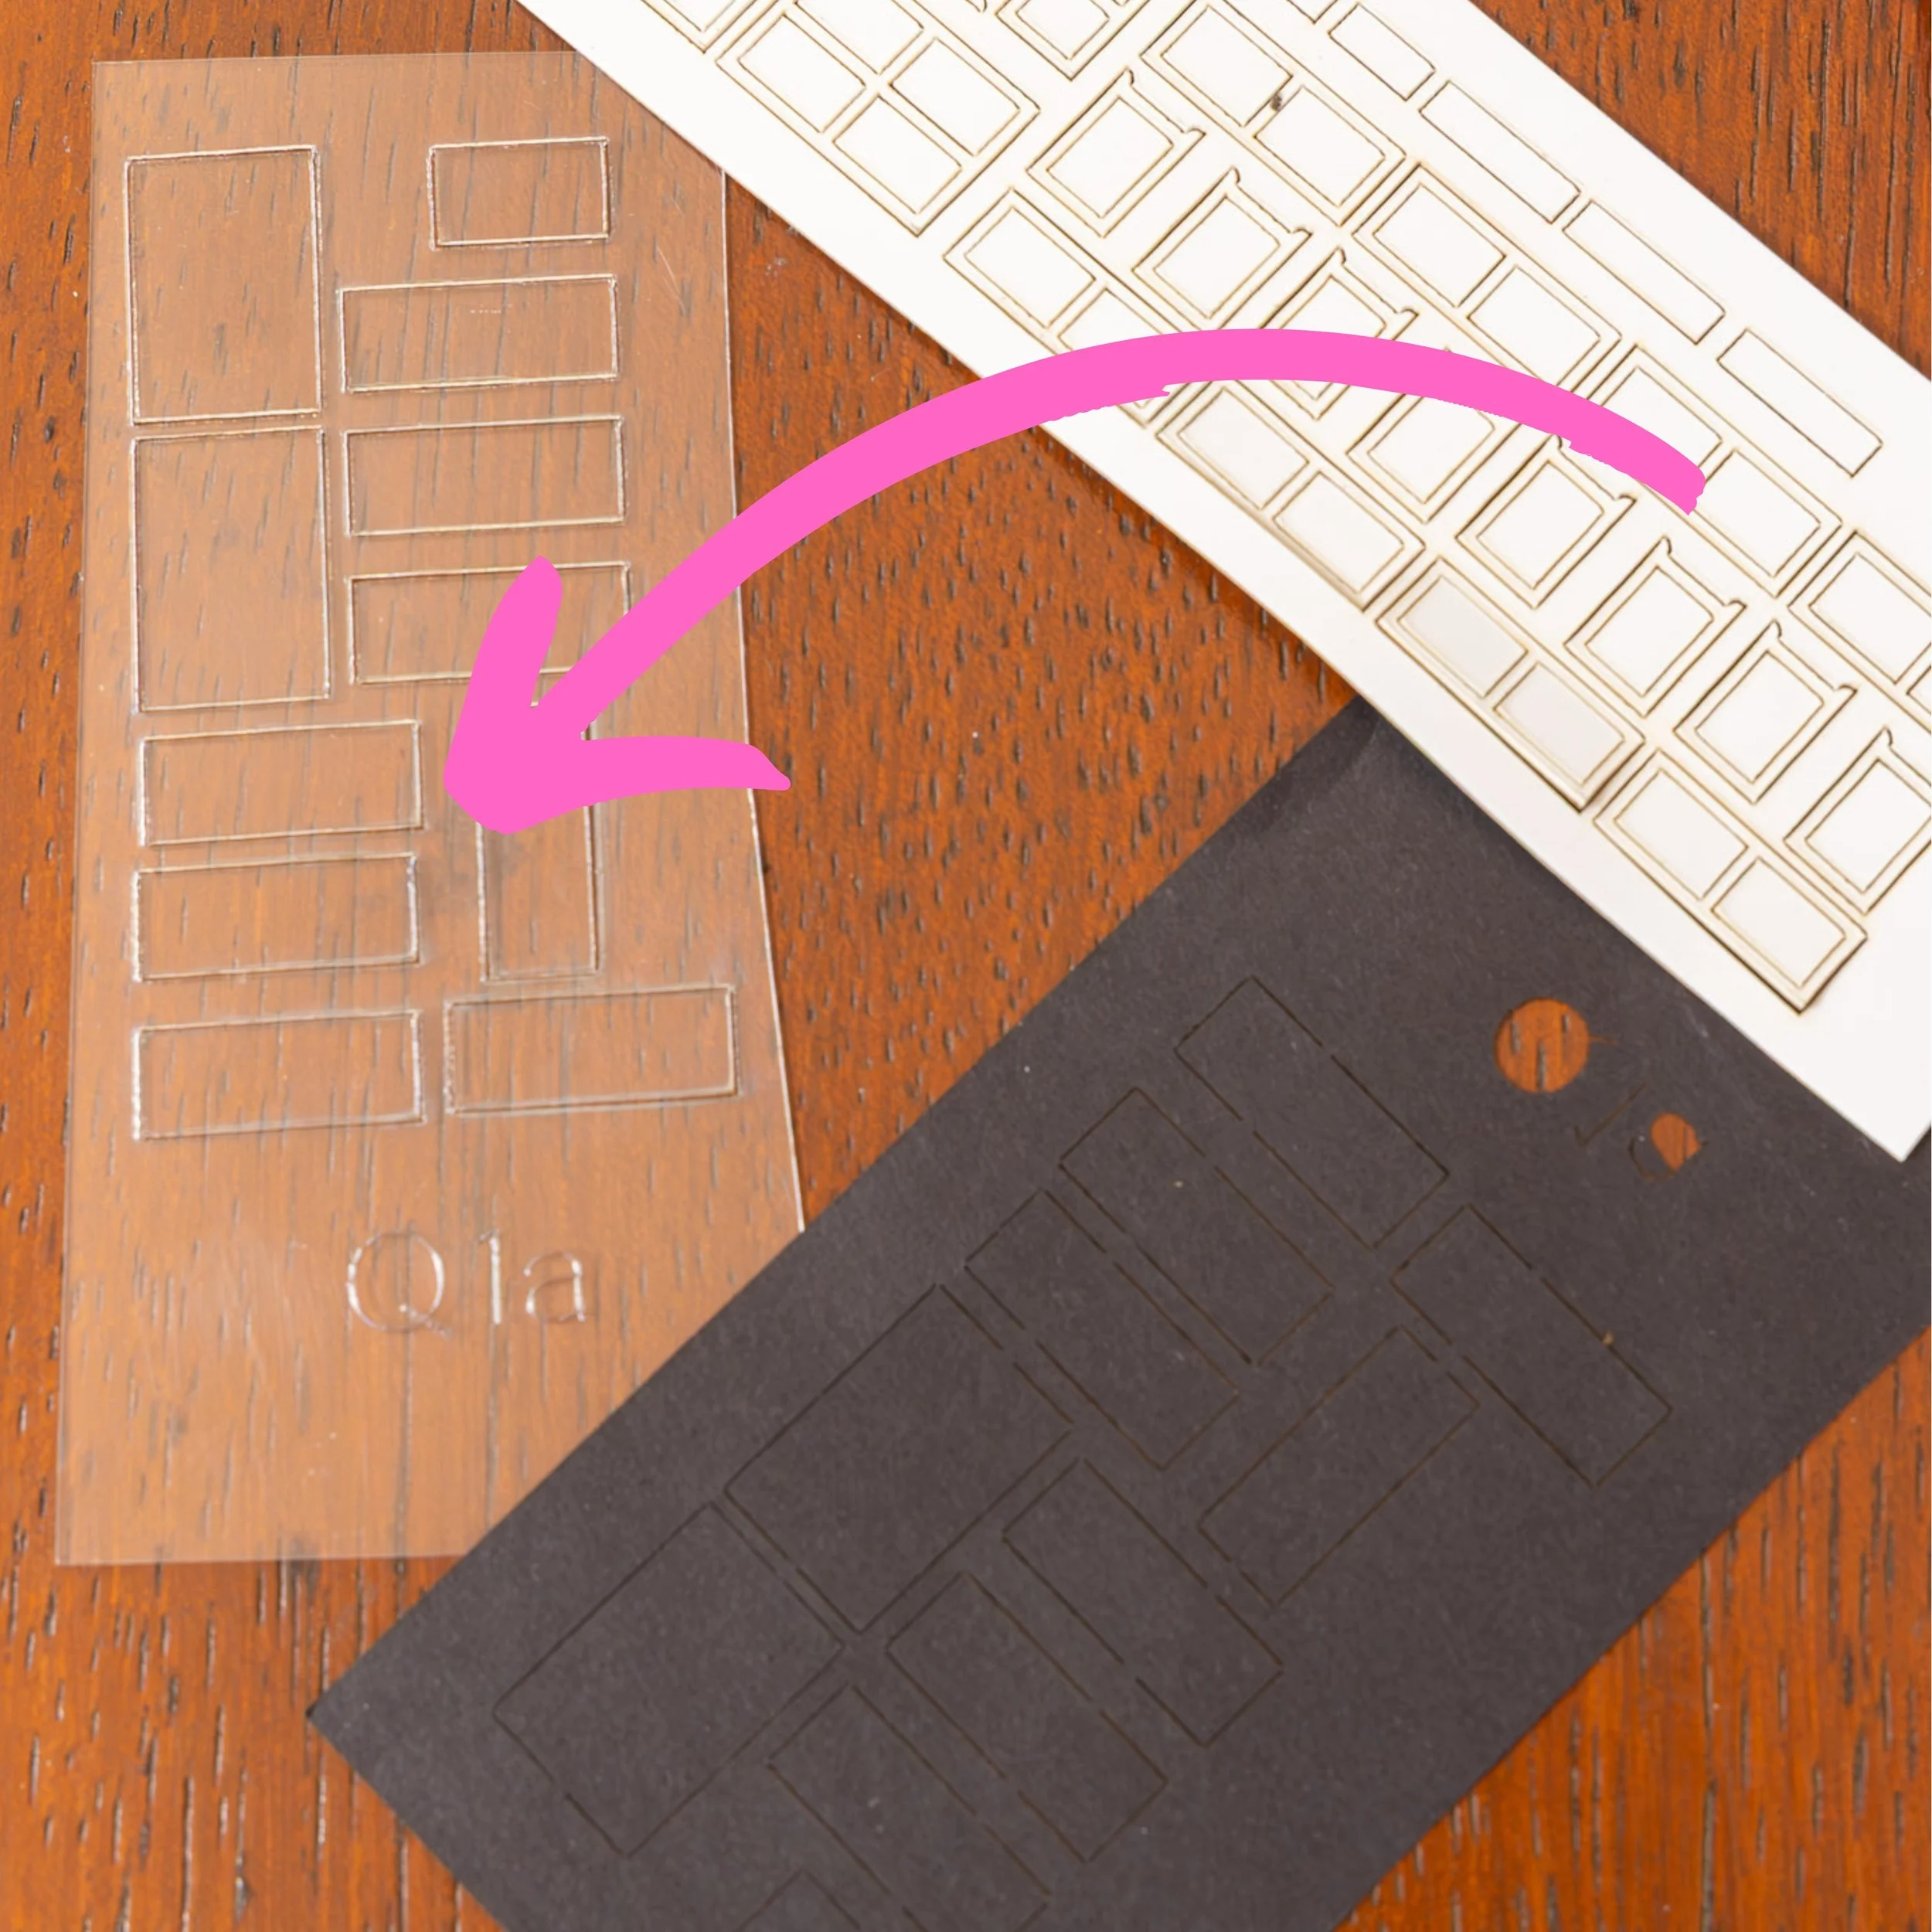
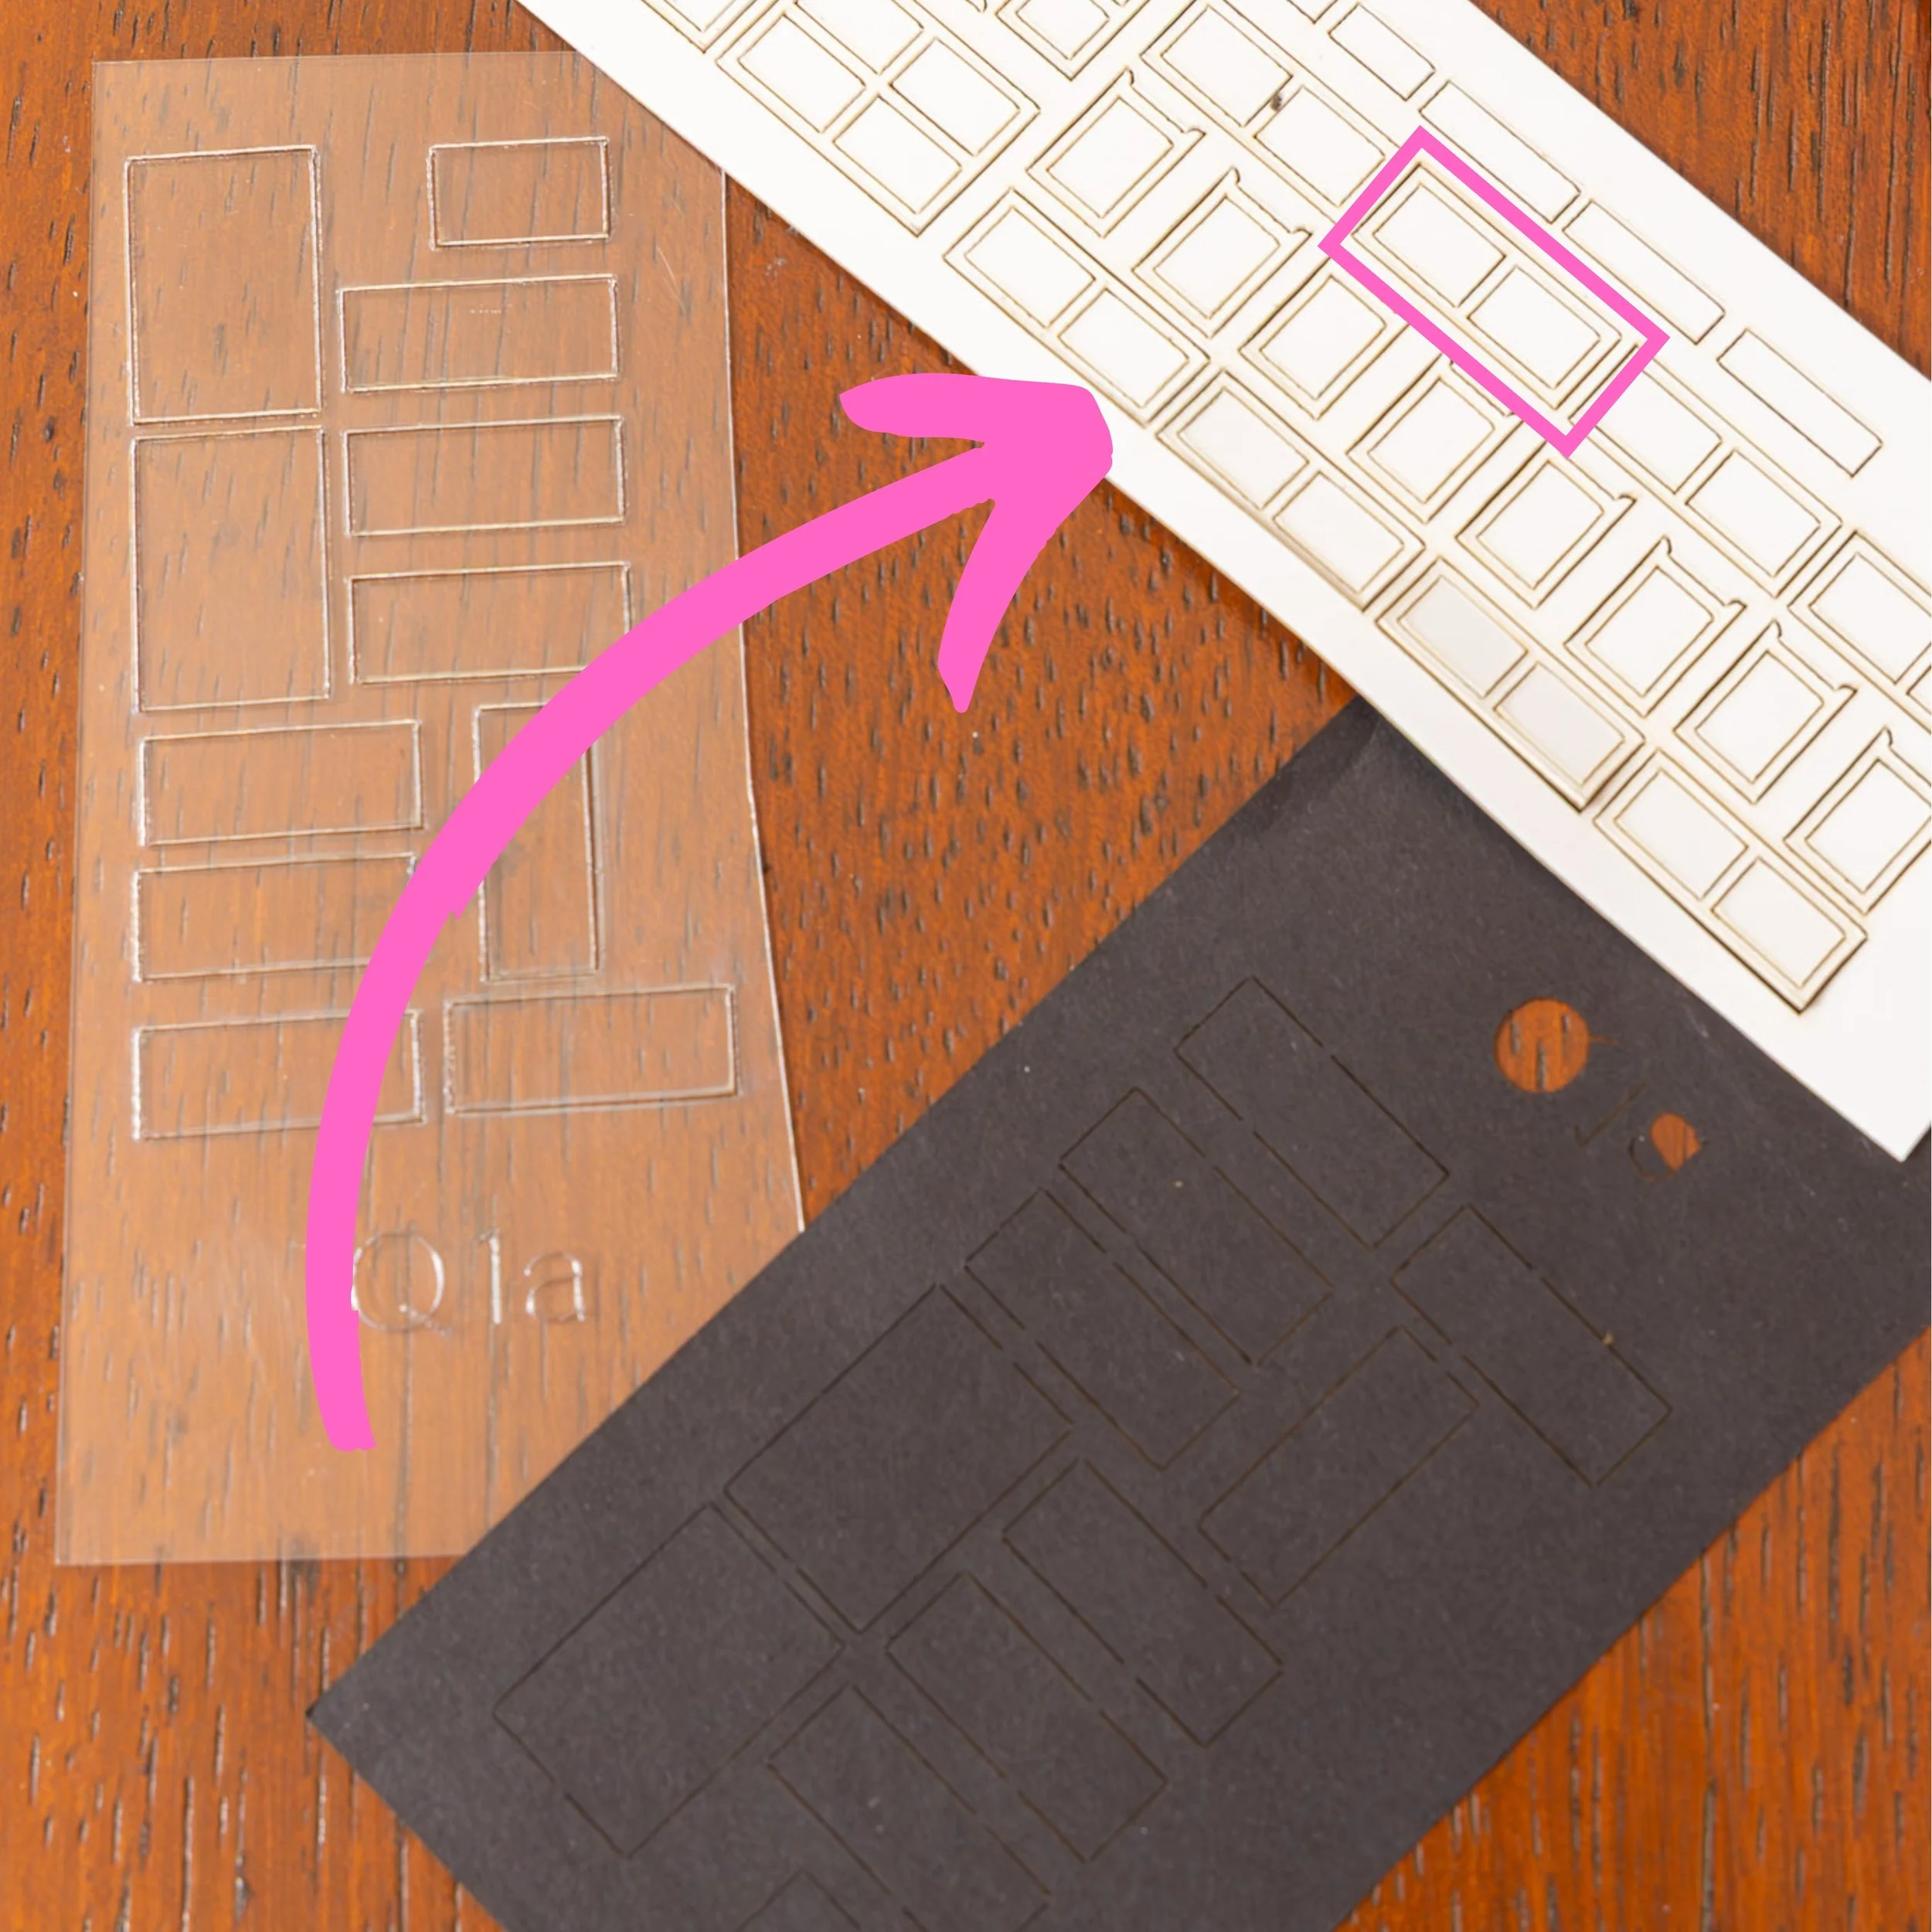
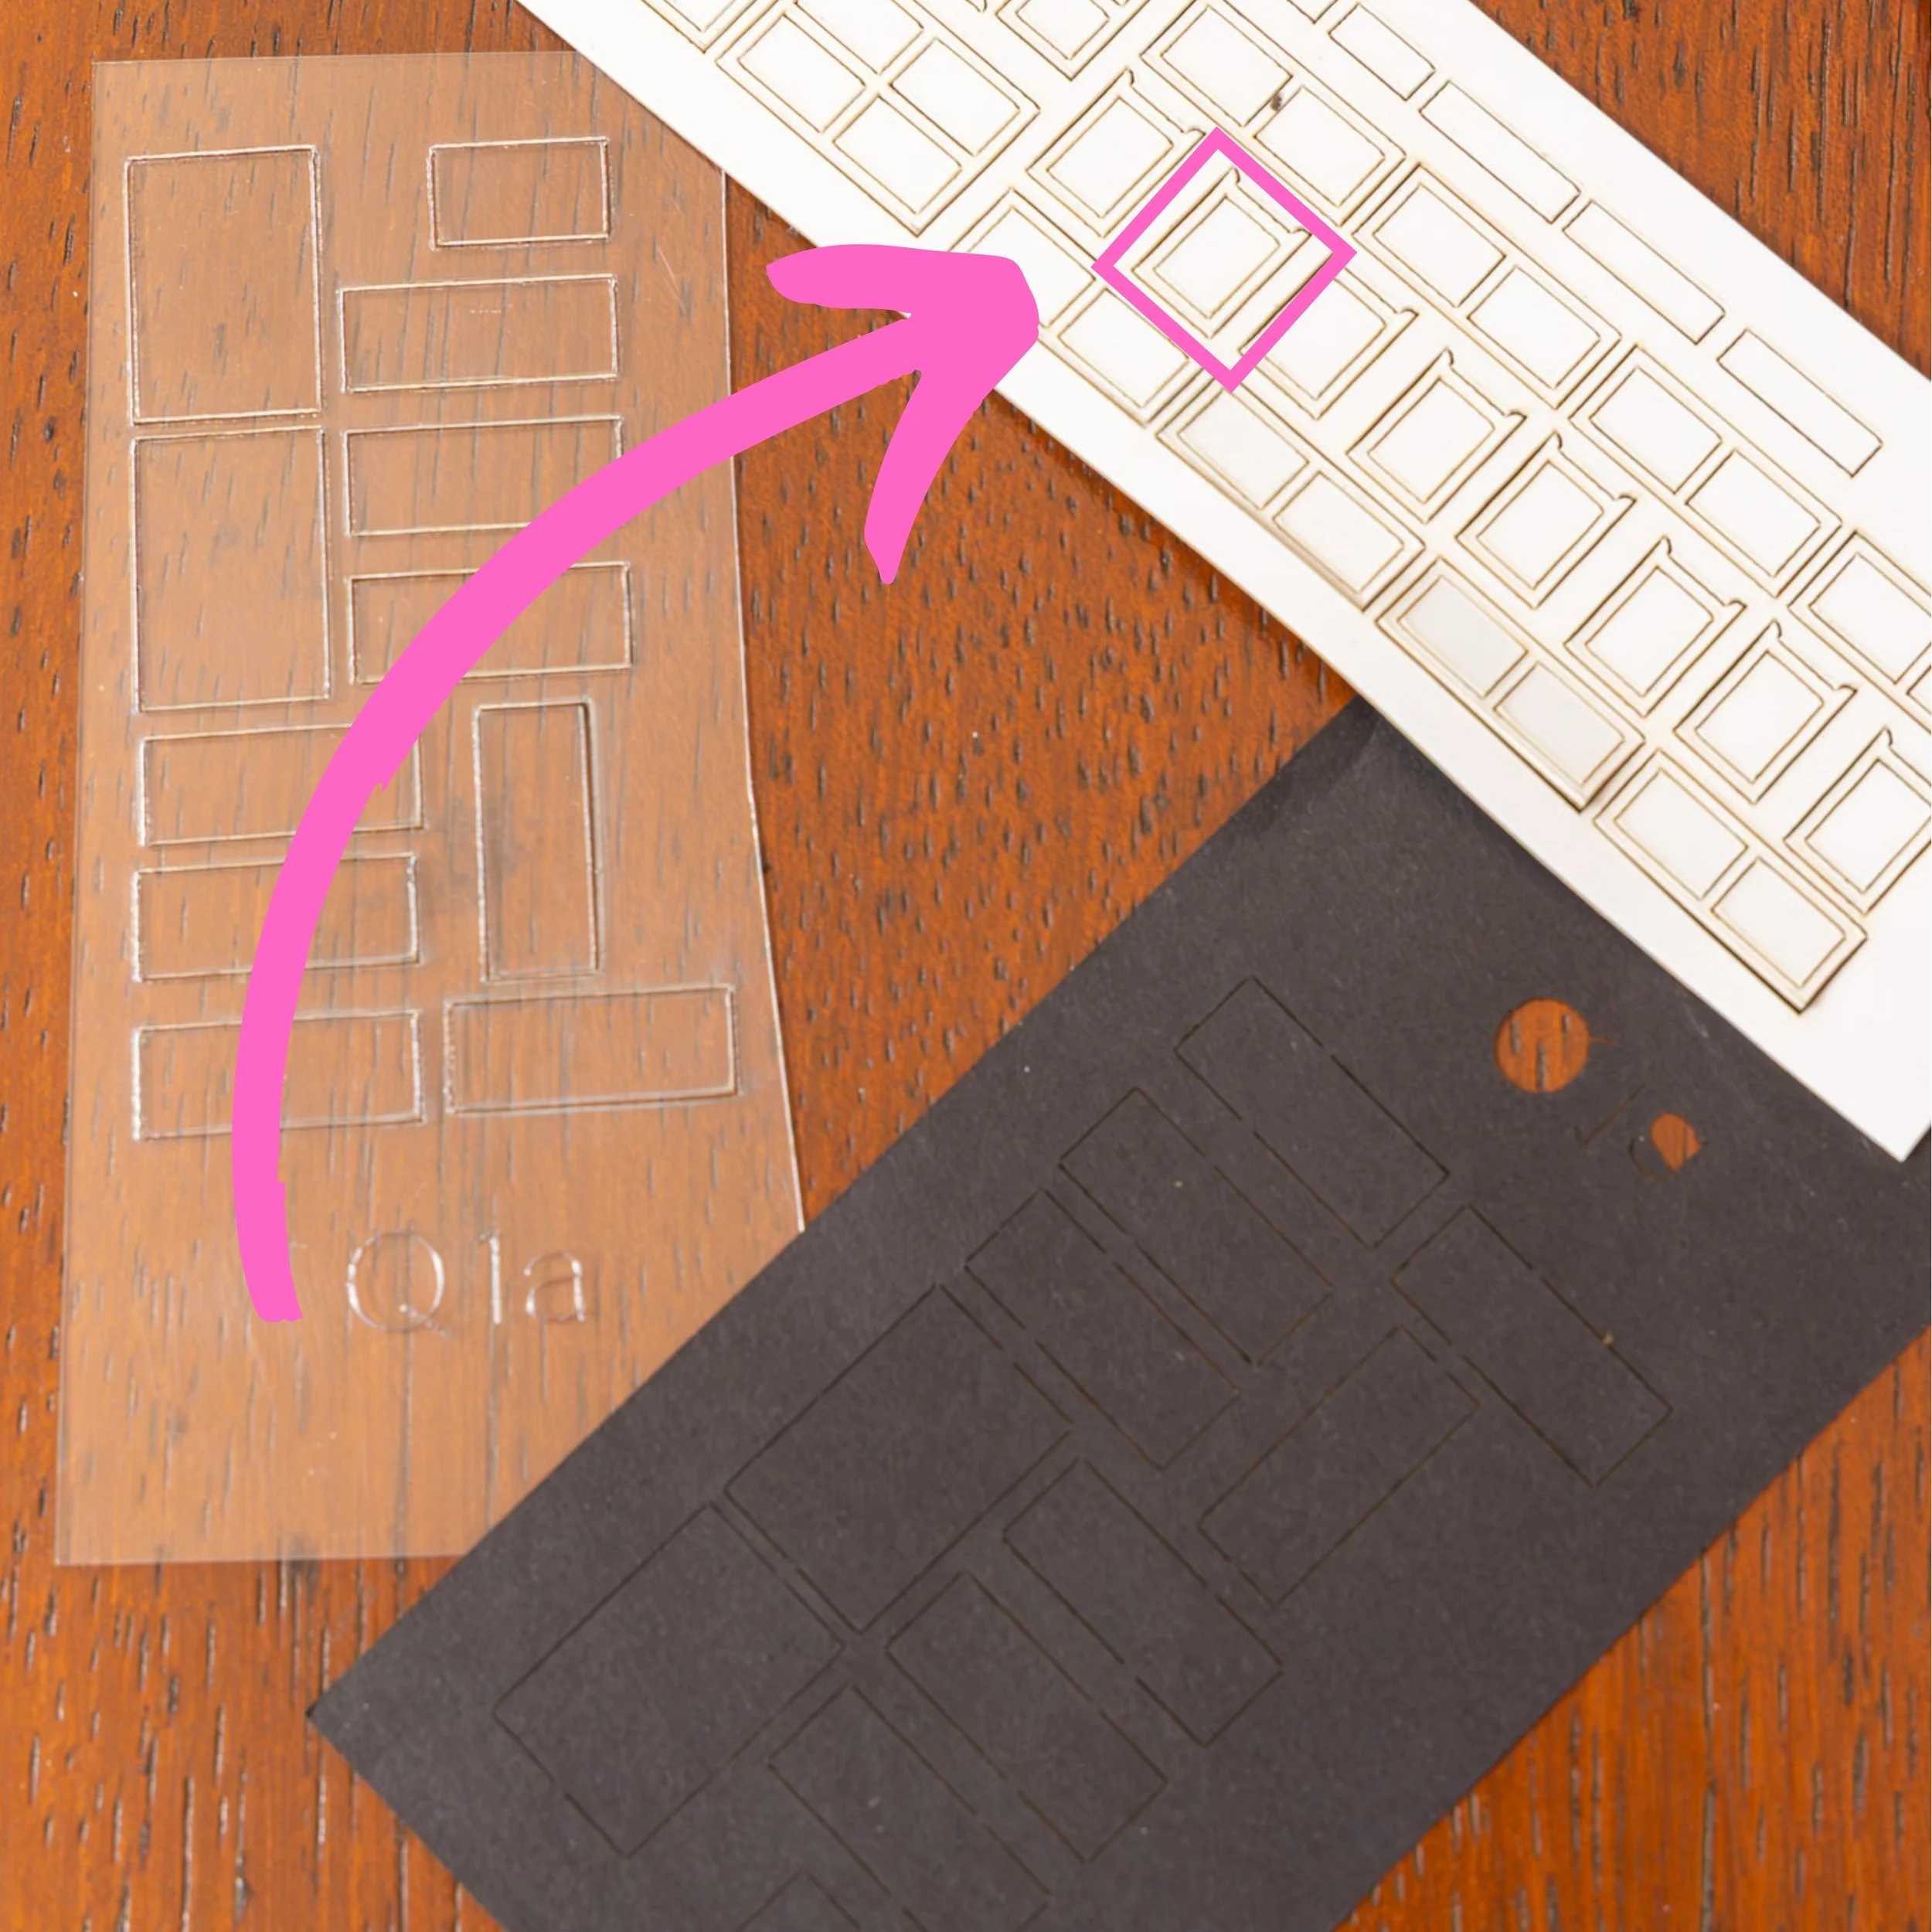
Each model comes with a set of decals to create the windows. These kits include 3 different sheets of components: the black backing, the clear plastic “glass” and the white sticker window and sash frames.
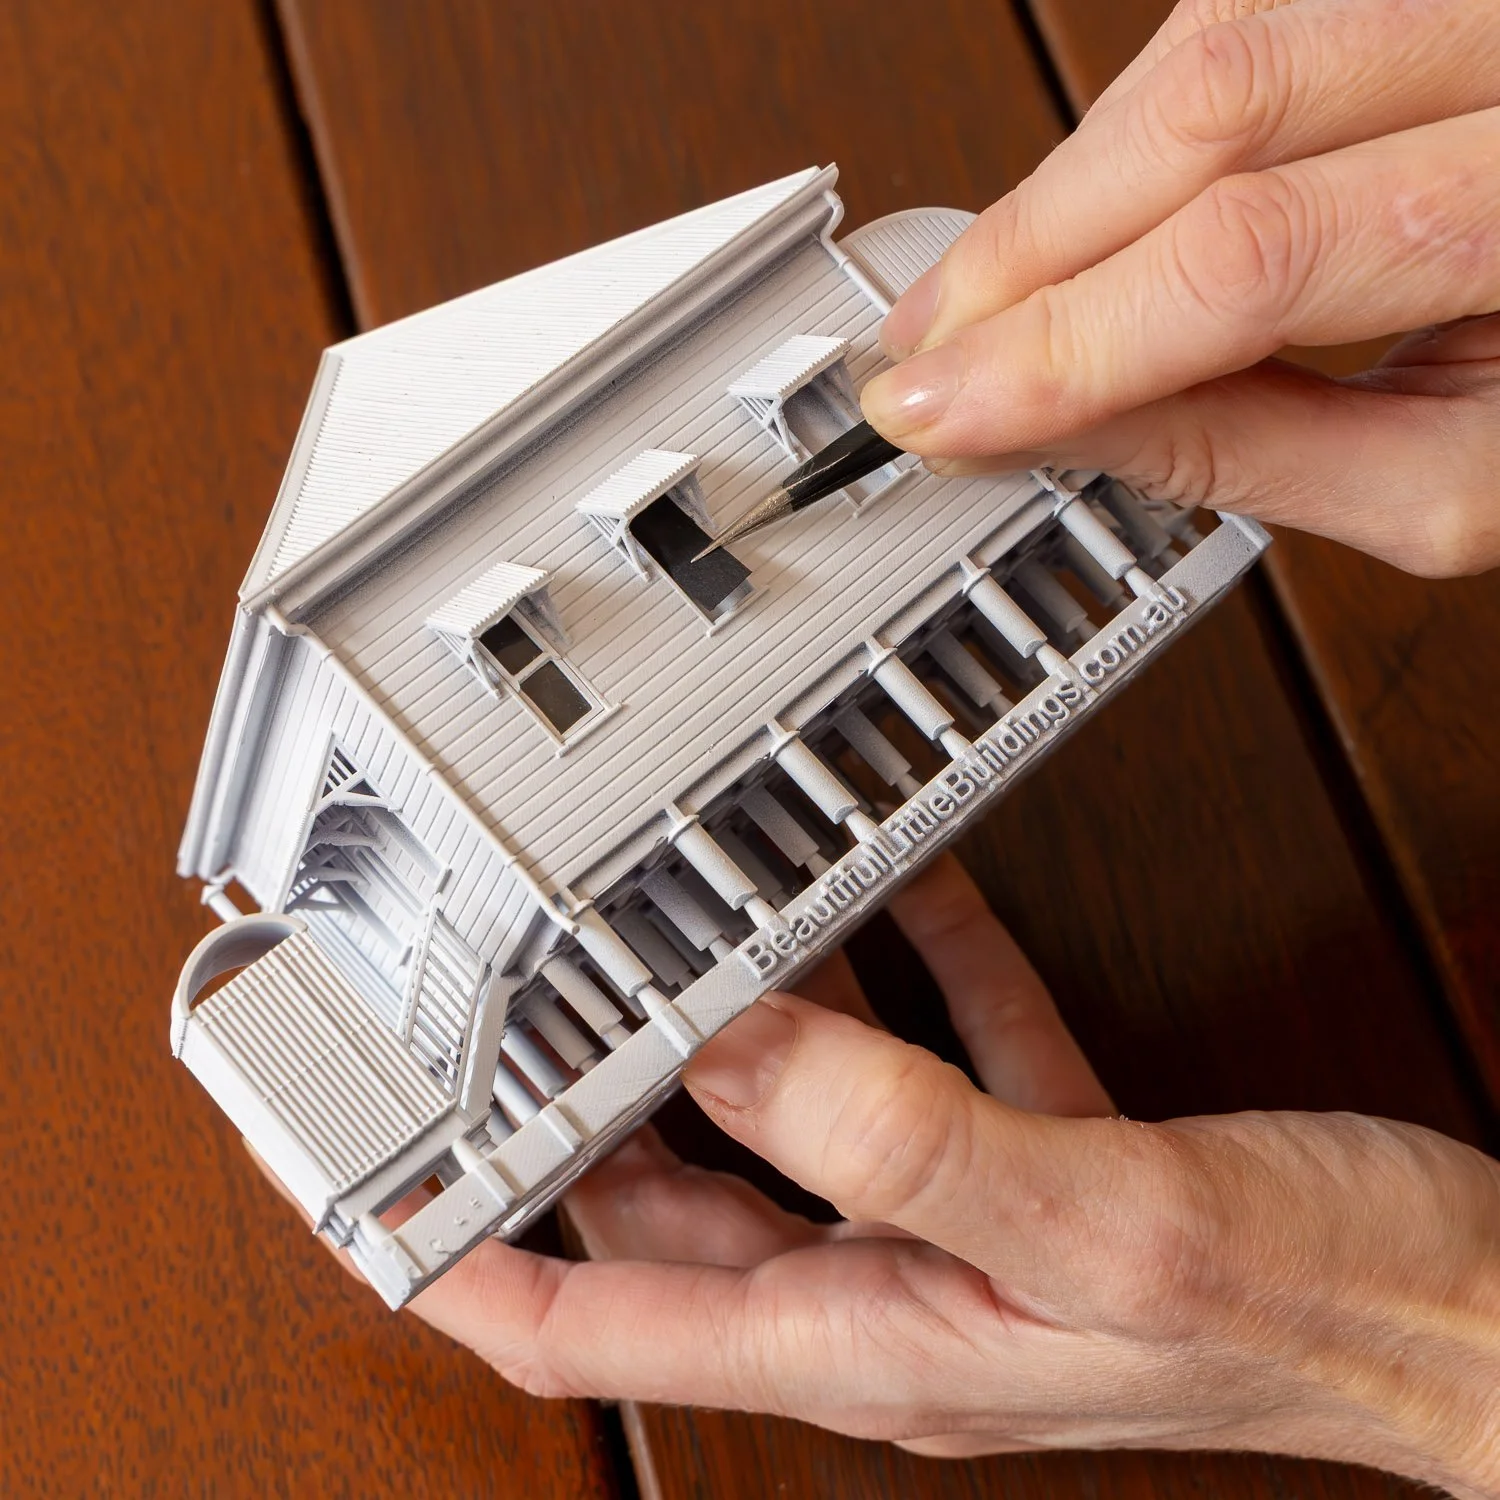
The windows and frames are precisely laser-cut to fit their recesses, and the frames have a peel-off sticky back so they slot cleanly into place over top. Tweezers make the process so much easier if you have them!
Although some models have multiple sized windows, the installation process is the same for all of them
See the photo instructions and video below
INSTRUCTION PHOTOS FOR WINDOW INSTALL
Remove a square of black paper that is the correct size for the window from the black sheet
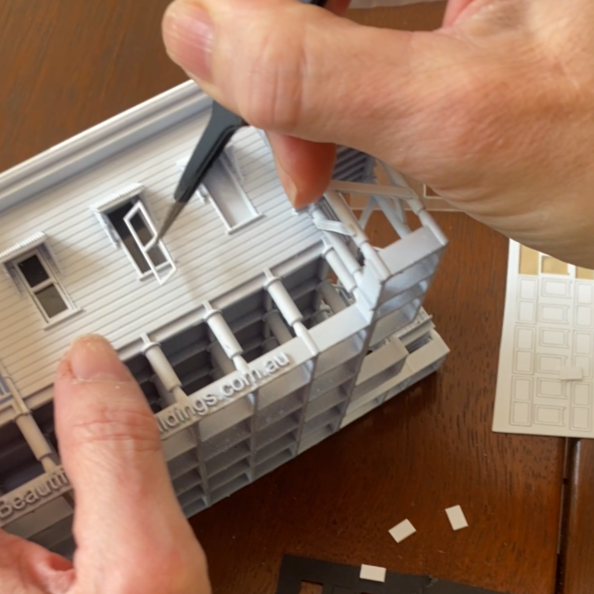
2. Gently place it in the required window recess and use the points of the tweezers, or the tip of something fine and pointy, to seat it in place and make sure the corners are all inside the recess and it is all sitting flat
3. Remove the clear plastic rectangle that is the correct size for the window from the clear plastic sheet
4. Gently place it in the required window recess and use the points of the tweezers, or the tip of something fine and pointy, to seat it in place and make sure the corners are all inside the recess and it is all sitting flat
5. Remove the window frame sticker from the backing sheet and push out the rectangles in the centre

6. Carefully place it over the black cardboard and clear plastic in the window recess and make sure it is sitting flat
7. Remove the top sash sticker from the backing sheet and push out the rectangle in the centre

8. Carefully place it over top of the top half of the window frame sticker you just inserted. This is meant to be the external sliding sash window, just like the double-hung windows you find in real Queenslanders!
9. Repeat the above process for all the window recesses

10. Sit back and enjoy how great your model looks and how clever you are! 😊
INSTRUCTION VIDEO FOR WINDOW INSTALL
the MAGIC MAKERS!
Richard and Patsy Brown are the awesome humans behind these houses! They run their model-making business, “Beautiful Little Buildings” from Bargara, near Bundaberg in Queensland. They also run a basil farm! 🌱
They do EVERY part of the model making process themselves: concept, design, drawing, testing, production, washing, de-supporting, painting, wrapping, packing, posting and admin!! So when I say designed and made in Queensland, I mean it!!
They use Anycubic M3 Max and M7 Max resin printers to produce their miniature masterpieces.
Richard and Patsy are also assembling a fantastic model railway display of their own and almost always have some kind of new R&D project under way!!
But as if they’re not busy enough with all of that, we’re also all busy cooking up ideas for more house and building designs for you all, so stay tuned! 😊
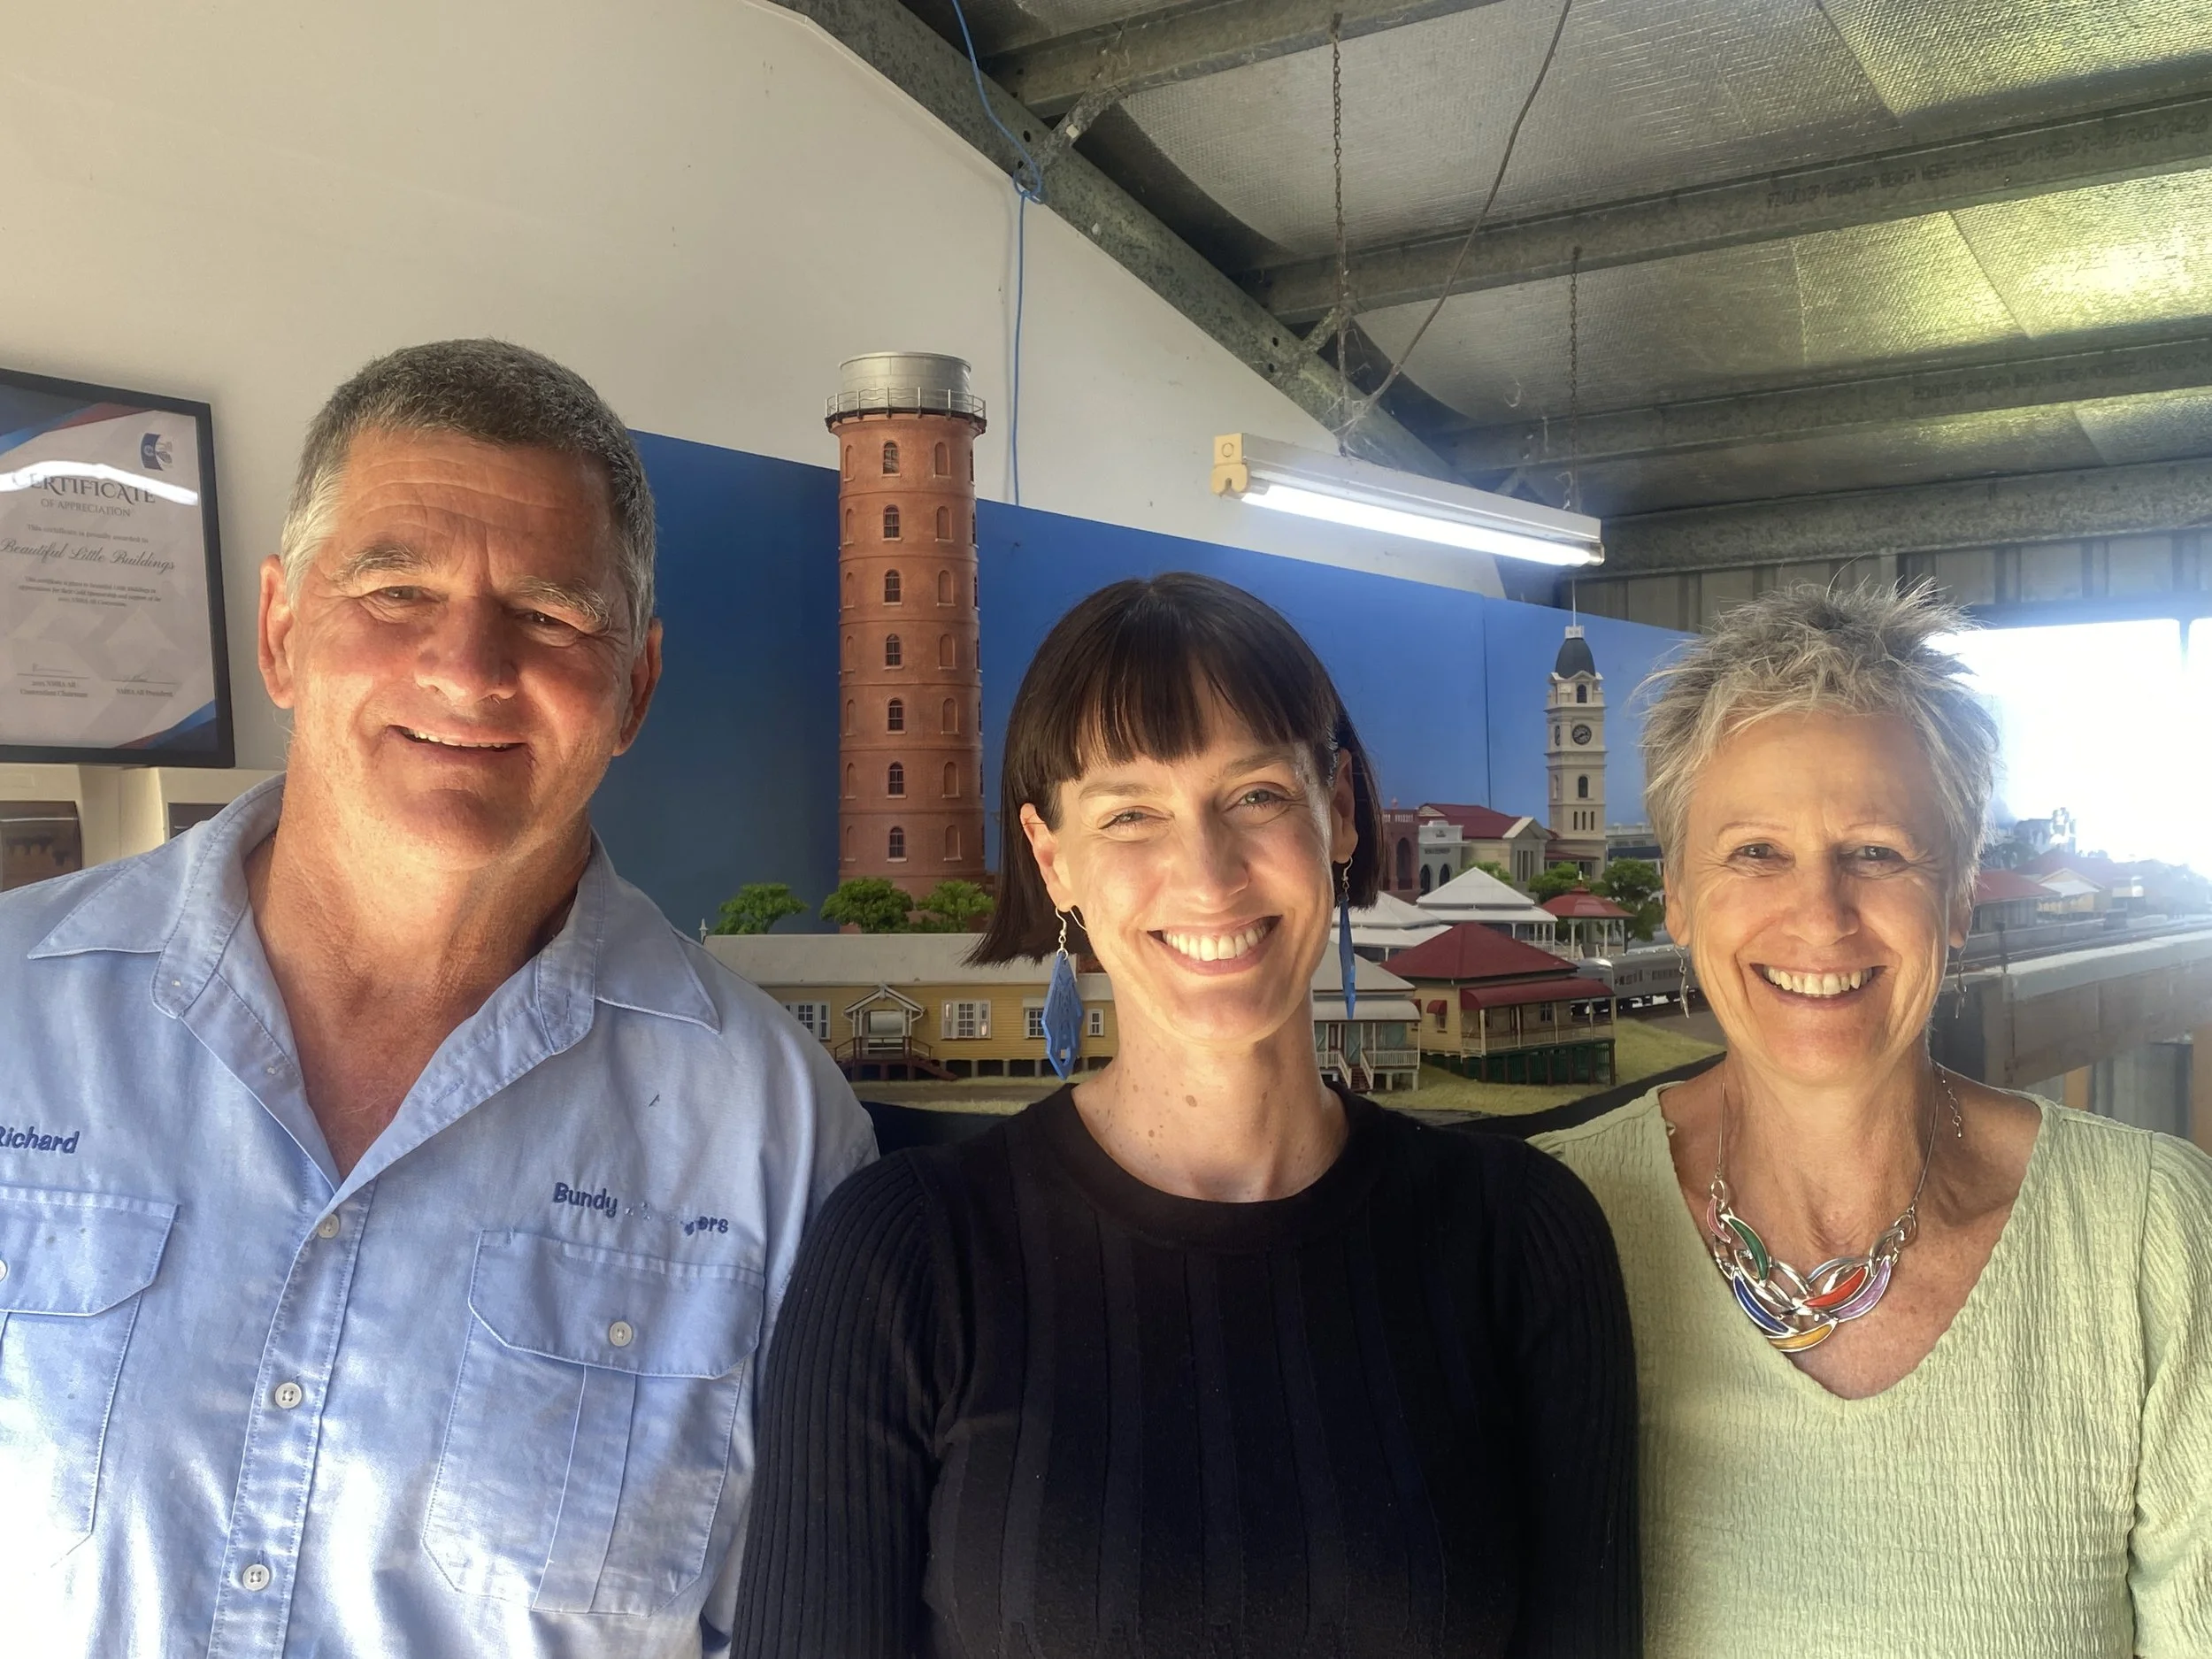
Richard, me and Patsy in their shed where the magic happens!
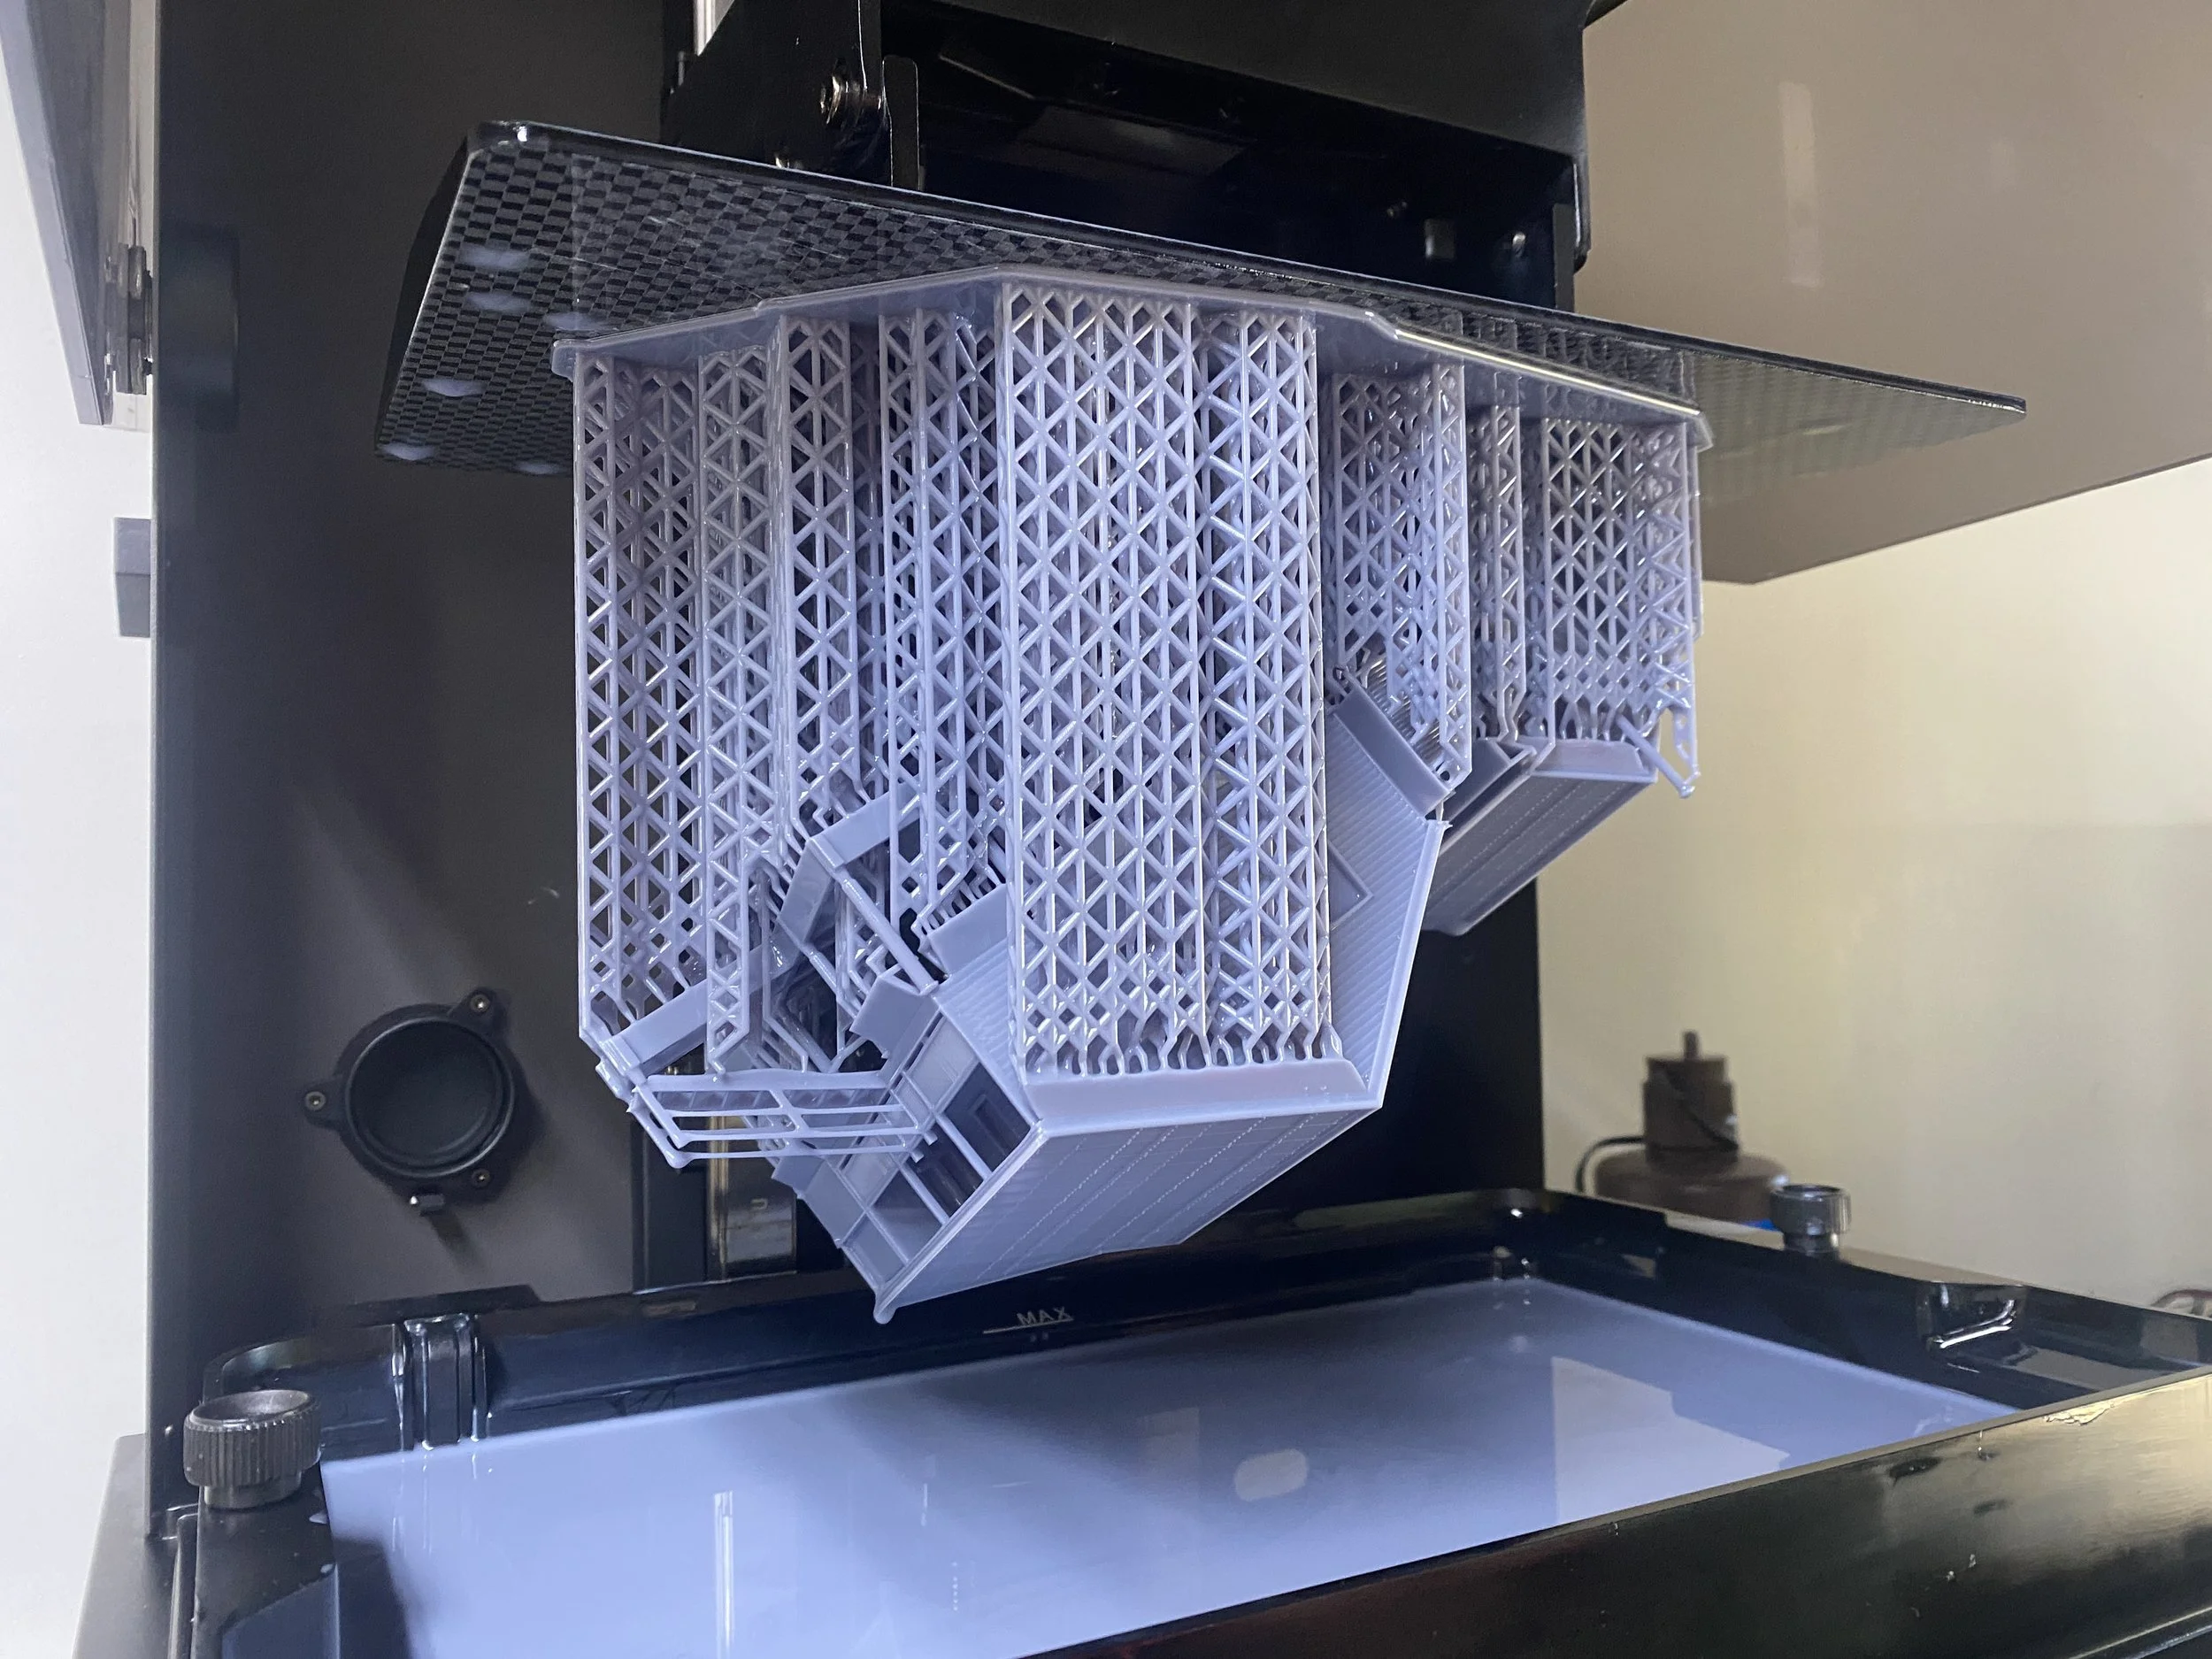
3D printng of a house model under way!
One of their resin printers
Want me to uncover the story of YOUR house?
I research the history of houses all over Australia. What secrets will your home have to tell??
View more information on my packages and prices here
Read more about some other houses that I have researched here
Get in touch with me here
You can also follow my research discoveries, history and adventures on Facebook, Instagram and YouTube
WANT TO DO YOUR OWN SLEUTHING?


DIY HOUSE HISTORY RESEARCH GUIDES
If you would like to give the house detecting a go yourself, I have a number of downloadable DIY House History Research Guides available for purchase.
You can view more information and d them here
I also have a FREE downloadable guide on how to find out if your house ever had a name, or if it didn’t, how to choose a suitable one. You can download it here